Managing capital allocations
Once you have set up your capital allocations, the Capital Allocations page allows you to manage your risk groups, capital assignments, and RAROC hurdle rate.
The Capital Allocations page has the following sub-tabs:
The Risk groups sub-tab allows you to add new risk groups, edit or delete existing groups, change your RPPS settings, or delete a group entirely.
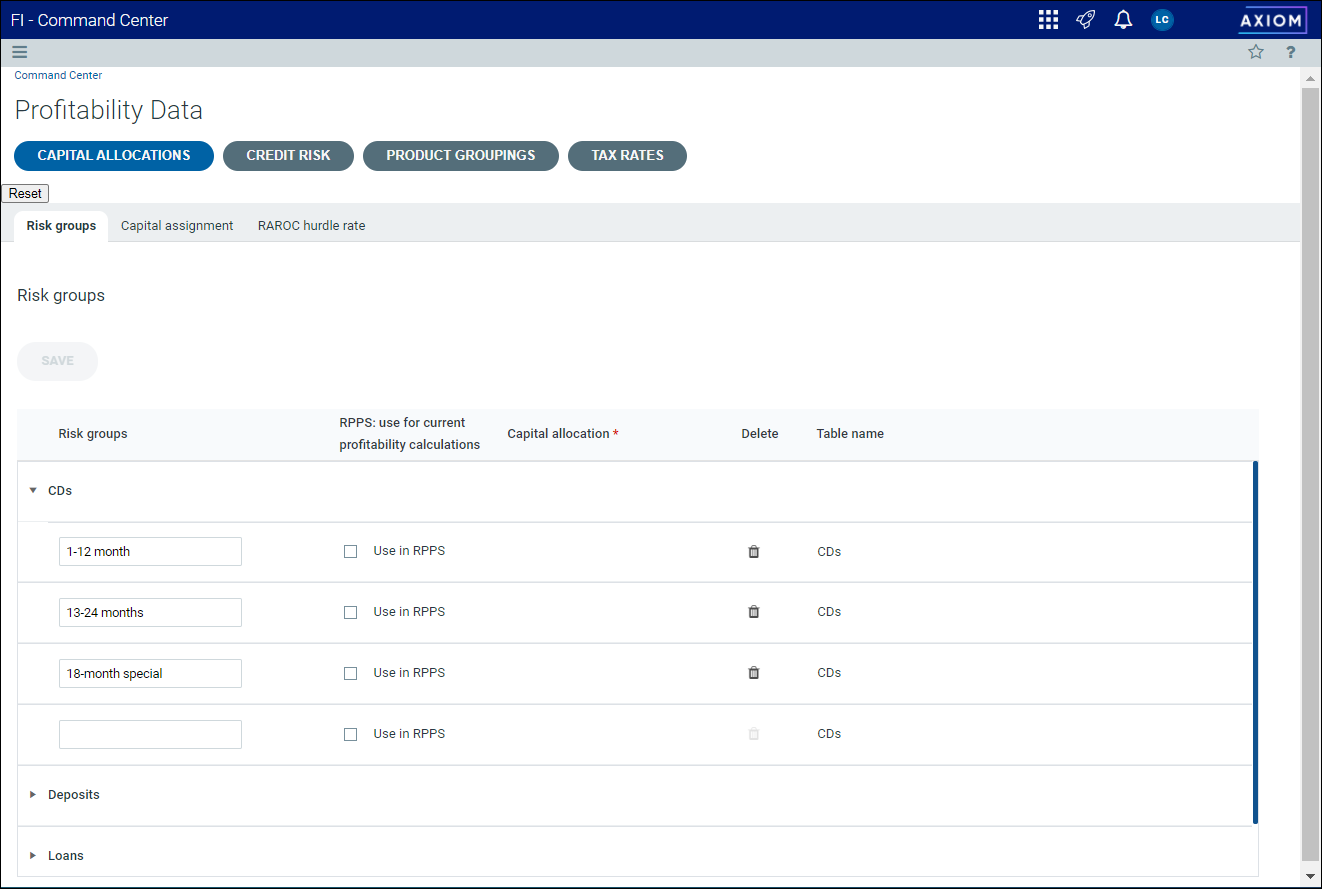
To add a new risk group:
-
From the Command Center, click Profitability Data > Capital Allocations.
-
On the Capital assignment page, click the Risk groups sub-tab.
-
Click the arrow next to the product type (CDs, Deposits, Loans) to view the existing risk groups.
-
Place your cursor in the blank row at the bottom and enter a name for the new risk group.

Click image to view full size
-
Select Use in RPPS, if desired.
-
Click Save.
-
Click OK at the prompt.
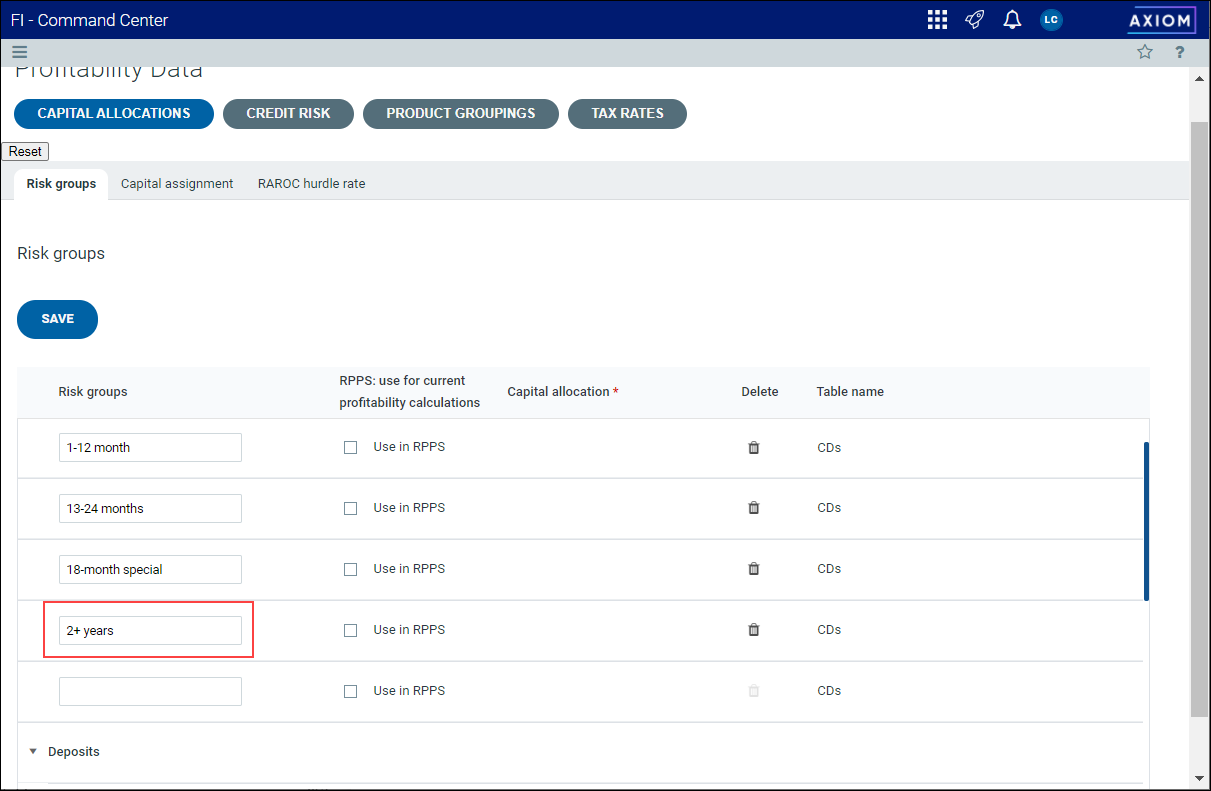
To edit a risk group:
-
From the Command Center, click Profitability Data > Capital Allocations.
-
On the Capital assignment page, click the Risk groups sub-tab.
-
Click the arrow next to the product type (CDs, Deposits, Loans, etc.) to view the existing risk groups.

Click image to view full size
-
Update the names of the risk group and the Use in RPPS setting, as needed.
-
Click Save.
-
Click OK at the prompt.
You can delete a risk group only if it is not already assigned to a product.
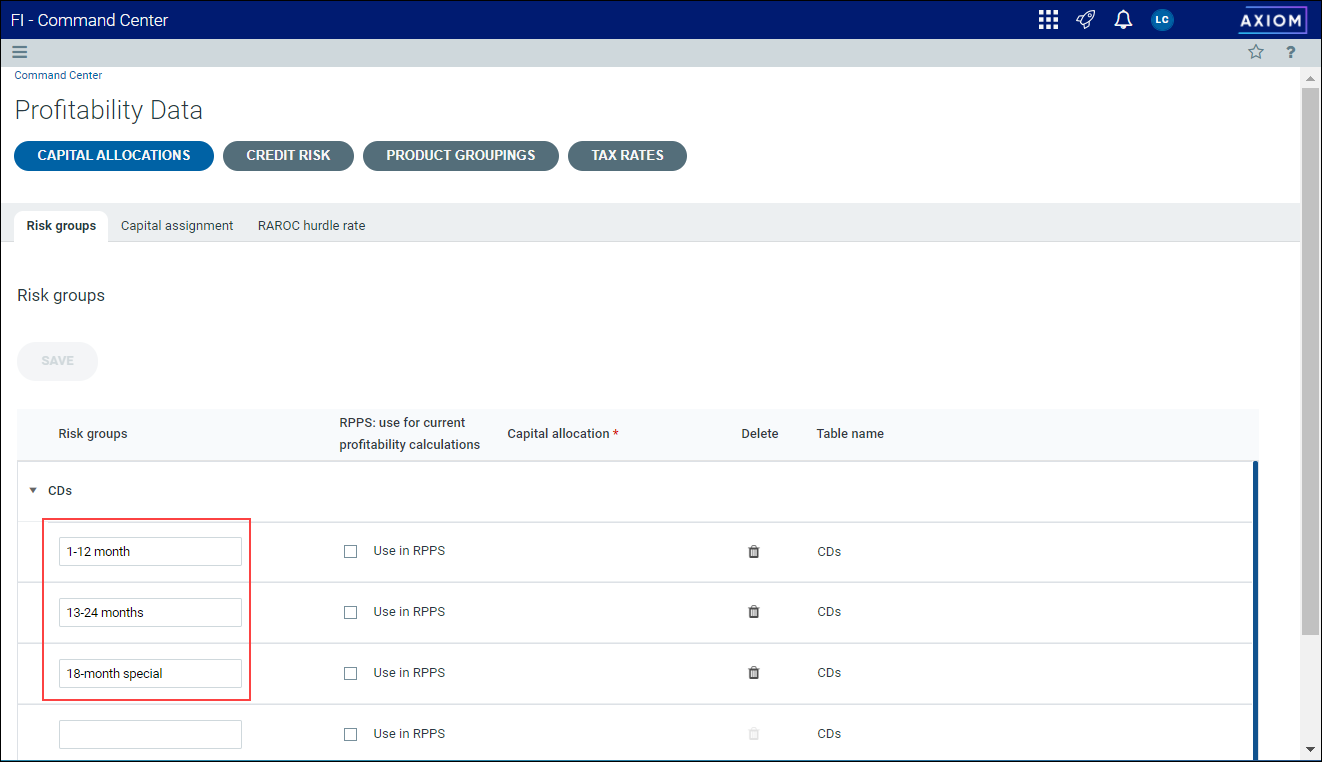
To delete a risk group:
-
From the Command Center, click Profitability Data > Capital Allocations.
-
On the Capital assignment page, click the Risk groups sub-tab.
-
Click the arrow next to the product type (CDs, Deposits, Loans, etc.) to view the existing risk groups.
-
Click the Delete icon
 next to the group you want to delete.
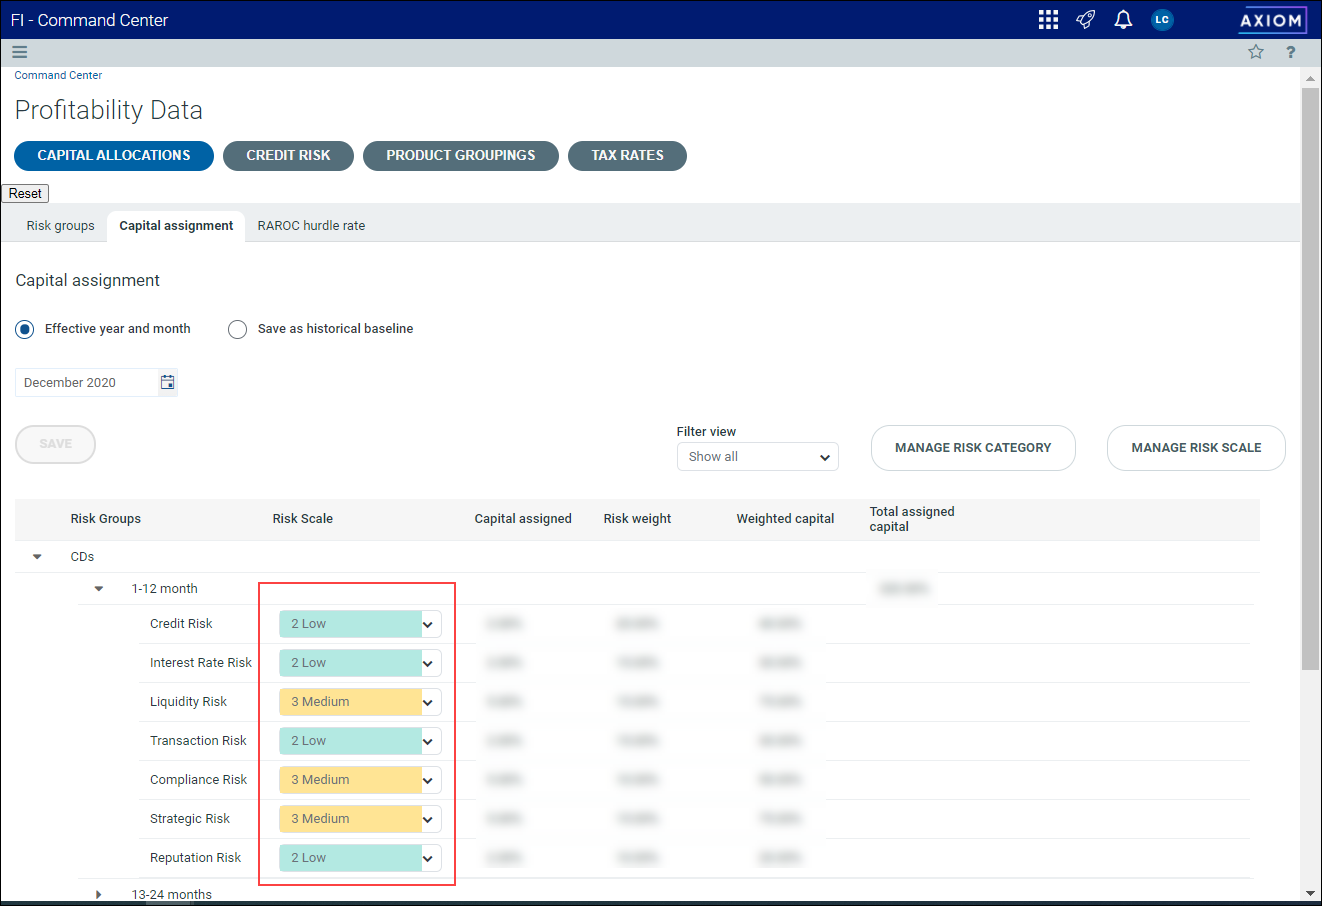
The Capital assignment sub-tab on the Capital Allocations page allows you to update the assigned risk level for each group, edit your risk category, and manage your risk scale.
Updating assigned risk levels
To update the assigned risk for a group:
-
From the Command Center, click Profitability Data > Capital Allocations.
-
Click the Capital assignment sub-tab.
-
Click the arrow next to each product type to review the existing risk groups.
-
Update the assigned risk settings as needed. The Capital assigned, Risk weight, Weighted capital, and Total assigned capital columns will be updated accordingly.

Click image to view full size
-
When complete, click Save.
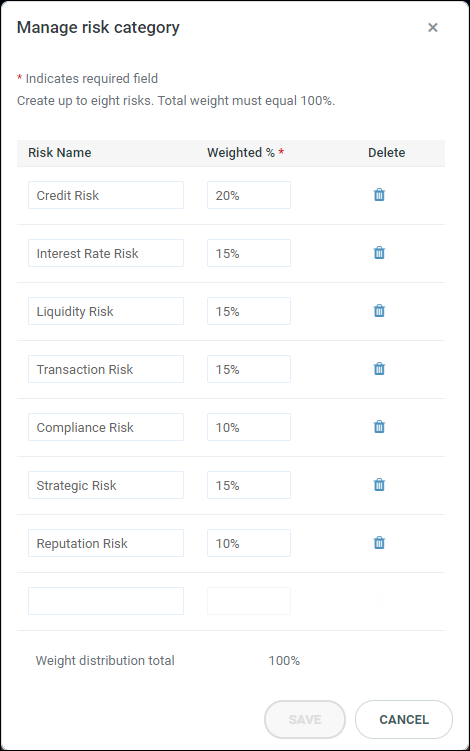
Managing your risk category
You can change the names of risk types and the weighted percentage for each, as well as add or delete risks.
To edit a risk category:
-
From the Command Center, click Profitability Data > Capital Allocations.
-
Click the Capital assignment sub-tab.
-
Click Manage Risk Category.
-
Edit existing risk names, or enter a new risk in the blank row at the bottom of the dialog. To delete a risk, click the Delete
icon. -
Enter new values in the Weighted % column, as needed. This figure represents the percentage of risk to the organization as a whole. The total weight for all types must equal 100%.

Click image to view full size
-
Click Save when your changes are complete.
-
Click OK at the prompt.
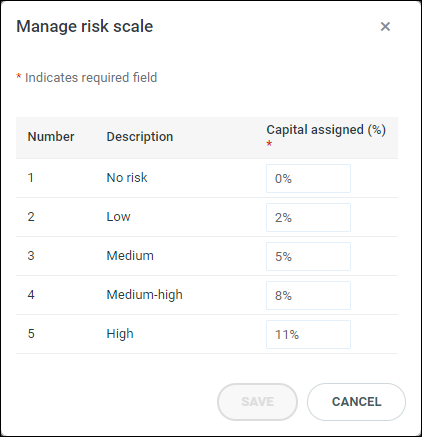
Managing risk scale
You can change your risk scale as needed by updating the capital assigned for each risk band.
To edit the risk scale:
-
From the Command Center, click Profitability Data > Capital Allocations.
-
Click the Capital assignment sub-tab.
-
Click Manage Risk Scale.
-
Update the values in the Capital assigned (%) column as needed. This represents the percentage of capital necessary to cover these risks.

Click image to view full size
-
Click Save when your changes are complete.
-
Click OK at the prompt.
Setting the effective year and month
You can update the effective year and month
To set the effective year and month:
-
From the Command Center, click Profitability Data > Capital Allocations.
-
Click the Capital assignment sub-tab.
-
Click Effective year and month.
-
Click the calendar icon to select a new year and month
Or
Type the month and year in the calendar field.
-
Click Save.
Saving an historical baseline
To save data as an historical baseline:
-
From the Command Center, click Profitability Data > Capital Allocations.
-
Click the Capital assignment sub-tab.
-
Click the arrow next to each product type to review the data for each product type and risk group.
-
Update the risk scale settings as needed.
Click image to view full size
-
When complete, click Save as historical baseline. The date you entered will now be saved as year 0.
Once you have set up capital allocations, you can adjust the RAROC hurdle rate as needed.
To change the RAROC hurdle rate:
-
From the Command Center, click Profitability Data > Capital Allocations.
-
Click the RAROC hurdle rate sub-tab.
-
Enter a new rate in the RAROC hurdle rate field.
-
Click Save.
